This
tutorial is a personal creation from Valérie Savary, better known as
You can
find the original here. Any resemblance with another one would be only pure coincidence.
It is strictly forbidden to modify tubes, to change their names or take off the
watermarks, to present them on your sites or blog, to share them in groups,
to make a bank of images or to use them on lucrative purposes.
Thank you
to respect Valérie’s work and other artwork creators'work mentioned in the
original tutorial. Don’t hesitate to warn me if you have any trouble with this translation and I’ll try to fix the problem as quickly as I can. You can reach me here. Valérie
made this tutorial on September 19, 2020, with PSPX8. I have used PSPX to make my translation; you can follow this tutorial with any other versions of PSP, but the result
might be slightly different.
I always refer to the old scripts of Mirror and Flip.
Colors
Foreground color 1 #8a9a98
Background color 2 #8ea837
Additional
color 3 #3f4a4c
Additional
color 4 #ffffff
Plugins
Alien Skin Eye Candy 5 – Impact – Perspective Shadow - Drop Shadow Blurry
Filters Unlimited 2.0 – Two Moon – WarmCloth…
Filters Unlimited 2.0 – Tile & Mirror – Seamless Blend (horizontal)
Richard Rosenman – Solid Border
Let's
start!!
1
Foreground color 1 #8a9a98
Background color 2 #8ea837
Create a
Linear gradient
Open the
Alphafile 'Alpha-Ezia-VSP'
Window –
Duplicate and close the original
(we
always work on the duplicate in
order to
have it untouched if we need to start all over again)
Flood fill with the gradient
Effects –
Plugins - Filters Unlimited 2.0 – Two Moon – WarmCloth…
2
Layers –
New raster layer
Flood fill with color 3 #3f4a4c
Layers –
New mask layer – From image 'Narah_mask_0345'
Layers –
Merge – Merge Group Effects – Image effects – Offset Hor -217 and Vert 0
Layers –
Duplicate
Layers – Merge – Merge Down
3
Layers –
New raster layer
Flood fill with color 2 #8ea837
Layers –
New mask layer – From image Narah_mask_0344

Layers –
Merge – Merge Group
Effects – Plugins - Richard Rosenman – Solid Border
First, click on Lock Vertical to Horizontal then the settings
After
this, we should have this in our Layers palette:
4
Highlight
the bottom layer
Layers – Duplicate
Layers –
New mask layer – From image VSP279
Layers –
Merge – Merge Group
You don’t see anything yet, but that’s normal;
it all
happens in the next step
Layers –
Properties – Blend Mode Difference and Opacity 46
View –
Rulers
Activate the Pick tool (K) – Mode Scale – Position X to 0 and Position Y at 365
px
Type M to
close the Pick tool
5
Highlight
the bottom layer
Activate the Selection Rectangle Tool – Custom selection
and enter
these settings:
Selections
– Promote selection to layer
Selections – Select None
Effects –
Distortion effects – Curlicues
Effects –
Edge effects – Erode
Effects – 3D Effects – Drop Shadow 0 /
-20 / 65 / 45 with color black
Your
layer palette now looks like this
Your work
now looks like this
6
Activate
the Selection Rectangle – Custom selection
Enter
these settings:
Edit –
Copy special – Copy merged
Layers – New raster layer
Edit – Paste into selection
Selections
– Select None
Layers – Properties – Blend mode Multiply
7
Effects –
Image effects – Seamless Tiling – Default settings
Check
the materials palette that you have color 2 in the background
Effects – Plugins - Filters Unlimited 2.0 – Tile & Mirror – Seamless Blend (horizontal)
Effects –
3D Effects – Drop Shadow 0 / -20 / 65 /
45 with black
Layers – Merge – Merge Visible
8
Selections
– Load /Save Selection – Load selection from alpha channel – Load Selection
# 1
Layers –
New raster layer
Flood fill the selection with #ffffff (white)
Selections
– Select None
Effects – 3D Effects – Drop Shadow -2 / 30 / 78 / 20 with color black
9
Selections
– Load /Save Selection – Load selection from alpha channel – Load Selection
# 2
Layers –
New raster layer
Flood fill the selections with white
Selections
– Select None
10
Open the tube 'Fleurs50VSP' –
Remove the watermark
Copy/Paste
as a new layer
Selections – Load /Save Selection – Load selection from alpha channel –
Load Selection # 3
Selections
– Invert
Edit – Cut (or use the Scissors)
Selections – Select None
Layers – Arrange – Move Down
11
Highlight
the top layer
Effects – Texture effects – Blinds with color 2 #8ea837
Effects –
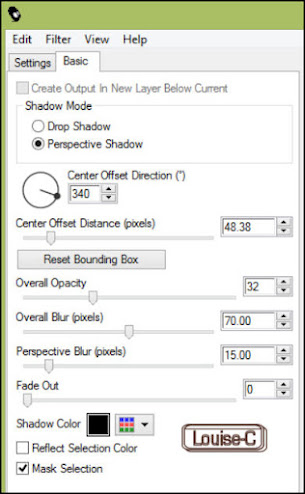
Plugins - Alien Skin Eye Candy 5 – Impact – Perspective Shadow / Drop Shadow
Blurry
12
Layers –
New raster layer
Flood fill with white (color 4)
Layers –
New mask layer – From image Narah_mask_0348
Layers –
Merge – Merge Group
Effects – Image effects – Offset Hor 0 and Vert -36
Layers –
Properties – Blend mode Overlay
Your
layers palette now looks like this

Your work now looks like this
13
Layers –
New raster layer
Flood fill with color 2 #8ea837
Layers –
New mask layer – From image Narah_mask_0418
Effects –
Edge effects – Enhance More
Layers – Merge – Merge Group
Image –
Flip
Image - Free rotate Left at 90°
Effects –
Image effects – Offset Hor 49 and Vert 35
Effects –
3D Effects – Drop Shadow -2 / 30 / 78 / 20 with #000000
Adjust – Brightness and Contrast / Brightness/Contrast
14
Open the
tube Deco1-Ezia-VSP - Copy
Back to
your image, Paste as new layer
Activate the Pick tool – Mode Scale - Position X 6 - Position Y 69
Type M to
close the tool
15
(If you
want to keep this nice border frame, start the script here!!)
Image –
Add symmetric borders of 2 px color 3 #3f4a4c
Image – Add symmetric borders of 2 px color 2 #8ea837
Image – Add symmetric borders of 2 px color 1 #8a9a98
Selections
– Select All
Image – Add symmeric borders of 75 px color 4 #ffffff
Selections – Invert
Keep
selection active
16
Effects –
Texture effects – Blinds / Color 1
Effects –
Texture effects – Blinds / Color 3 #3f4a4c
Selections
– Promote selection to layer
Effects – Texture effects – Blinds - Color 2 #8ea837
Selections
– Select None
(End the
script here)
17
Layers –
Duplicate
Image – Flip
Activate
Selection tool Rectangle (S) – Custom selection
Note
from the translator: for me, this setting had the custom selection too small and it
was selecting in the middle of the frames, so I modified these settings like
this:
which
allowed for the 3 frames to stay intact after the delete step thereafter)
Press
Delete on the Keyboard
Selections – Select None
Layers – Merge – Merge Visible
18
Selections
– Select All
Selections – Modify – Contract number of pixels 75
Effects – 3D Effects – Drop Shadow 0 / 0
/ 50 / 35 with color #000000
Selections
– Select None
19
Open the
tube Deco2-Ezia-VSP
Copy and
Paste as new layer
Don’t move it. It is in its place.
20
Open the
tube Deco3-Ezia-VSP
Copy and
Paste as new layer
Don’t move it. It is in its place.
21
Open the
tube Deco4-Ezia-VSP
Copy and
Paste as new layer
Objects – Align – Right
Note
from the translator: in my PSPX, 'Objects - Align' doesn't
work so I use the Move tool.
22
Activate
the tube 'femmeVSP206'
Copy and
Paste as new layer
Image – Resize – Resize 2 times by 75% uncheck 'Resize all layers'
Adjust – Sharpness – Sharpen
Activate the
Pick tool / Mode Scale / Position X 206 and Position Y 152
Type M to
close the tool
Effects – 3D Effects – Drop Shadow -19 / 23 / 50 / 45 with color #000000
23
Layers –
Merge – Merge All (Flatten)
Image – Resize the width to 800 pixels
24
Sign and
Save as a jpg or File - Export as an optimized jpeg.
I hope that you enjoyed making this tutorial as much as I had fun translating
it.
Valérie
has a gallery of all the results that she receives
from all
over the world and she loves to see your creations. Click here to send yours!!
BACK TO PSP INDEX
BACK TO MY TUTORIALS
BACK TO MY TRANSLATIONS
BACK TO MY BANNERS


